Sunday, 29 January 2012

Polymer clay play - Sliced pendants


Thank you for all your lovely and encouraging comments - and I have taken on board  your questions and will answer them in due course - during a post.  The beads are still a 'work in progress' so I have been experimenting - out of my depth as usual - but it's surprising how much you learn what 'not' to do during the process.

I guess the first 'rule' is not to jump too far ahead of yourself - but being an oldie I don't stick to rules any more - life's too short!  The things I am trying are projects that have been created by artists who have been working with polymer clay for over 20/25 years, and I am attempting them after a few weeks!

So, as requested - these are the before photos - before they are sanded and buffed etc The 'after photos' will probably be on Tuesday as I don't get much time on a Monday as I am out.

I layered up some different coloured polymer clays which were metallic.  
The next step was to poke holes in the layers, and then cut them out.

This is where the fun and the mystique starts!
Clay 'in the raw' above

And this is how they turned out after firing.
They go so much darker.

I am making pendants out of the clay, so cutting them out randomly.
This one reminds me of a pair of 'Flower Power' trousers. Mensm side ways on!
See how dull and 'flat' the colours are gone, and the rough edges along the sides - that's why you have to do all the sanding and buffing

Sanding and buffing, sanding and buffing, sanding and buffing, sanding and buffing.
I know it's tiresome reading that, but imagine how tiresome it is to be actually doing it 6 times!
This I made out of leftovers - and I think I like it best of all!
Once I have sanded off all the rough edges, and then do the sand/buff treatment, I think it will come up a treat.


Thursday, 26 January 2012

More experimental beads.

I have been making some moulds 'behind the scenes' which I won't be using for a while, so thought I would post you my latest work in progress.

Last night I thought I would have a go at the  'Skinner Method' but went wrong somewhere - I think I wasn't using enough polymer - just using up leftovers.  Waste not want not is my motto!

I used two shades of pink and fuschia and a tad bit of metallic blue

Everyone is different - absolutely no two beads the same

It'll be interesting to see what they look like after baking

These beads a teeny weeny ones.

This is blue clay - and I mixed blue glitter into to it - lots of it.
When I went to make the holes last night, the beads were just too tiny to make a hole big enough to thread onto wire or beading 'tiger tail' so I had to redo them this morning into rounder beads.

Off to get them out of the oven!

Well they all baked up fine - so my next job is to sandpaper them all.
It's not my favourite job, and takes a long time !

Monsieur Moth - update

Thank you for all  your wonderful comments and suggestions on how to fix a 'hangy' thing to turn my moth into a pendant.

I didn't drill it - too scary.

But whilst searching for some charms to create moulds out of  (the shop only had teeny weeny ones)  I did spot a teen weeny charm that I thought would be ideal for a fixing - so here it is!

The light is not doing the back any favours - as it's showing a close up of every little thing.  When making something as complicated as this - and with several 'firings' you just can't get the back totally smooth - there are too many elements - and even if it looks smooth when you bake it - it never stays that way.  The solution is to sandpaper it - but as this was fragile and with so many curves, I have just left it.

I might give it another coat of paint at the back - but realistically no one will see the back!

Monday, 23 January 2012

Monsieur Moth

Sadly I have only been playing with polymer clay for a few weeks - but inspired by Donna Kato (who has been working with polymer clay for twenty years or so and is very famous)  whose book I got for my Christmas present - I decided not to make her Madame Butterfly as I have neither the talent or all the things one would need to do so - but instead - may I present to you ..........
 Monsieur Moth

Oh dear, I see he has a couple of flecks of gold on his face - I need to wipe them off!  
(My eyesight is bad, so apologies)
I got my inspiration from an Egyptian Sarcophagus
(my husband says that's the thing in your throat - anyway - I mean the grave/tomb thingie)

 So this pendant, is a cross between an Egyptian tomb mask, with the idea of a moth as opposed to Donna Kato's wonderful butterfly.
It's only little 7cms x 7cms - and was very fiddly to do, and has taken me all the time since my last post!
I'll wear it as a pendant - just need to get my son to drill into the back 'ouch' so that I can attach a ring or two - I am too scared to do it myself!

The little grey mark you see on the right hand side is in fact just a reflection of the light.  I took the photo, put the picture on here and saw it, but having rushed back to look at the 'grey mark' it's non existent!
Thank you for visiting

(If you looked earlier you would have seen so many typing errors, which I hope I have now corrected.  My eyes are still recovering from a hospital visit this morning - so no crafting today)

Monday, 16 January 2012

Finished my first 'trial' at home made beads

Well - this evening I surprised myself and made a necklace and a pair of earrings from my home made polymer clay beads - and I haven't  had a single polymer clay lesson yet!

It's a bit late at night to be taking photos but I couldn't wait to get these on  here.
This is really just a practice set as they are my first so I am on a learning curve.
To make the beads, I used three strips of polymer clay in red, white, and blue.
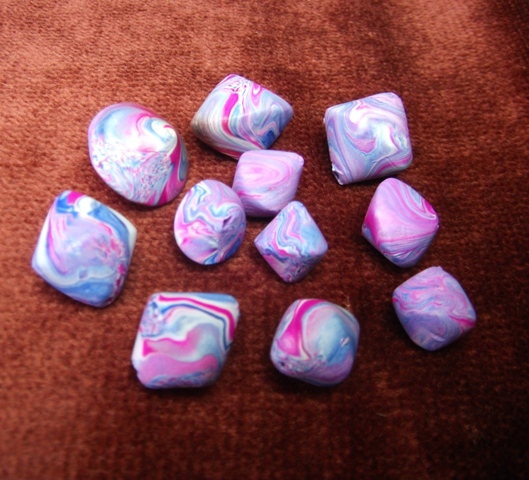
After conditioning them, I had three 'sausages' which I laid side by side, and then twisted them around like a stick of rock.  I just kept going until I got a pattern I like.  I rolled then into different size balls, and laid them one at a time on a tile, placed a piece of perspex on top, and rolled each one around with the perspex and they turned into bicones.   I pushed a needle through each one - which is a bit tricky with cone shaped beads then cooked them for half and hour on 130c

Unfortunately I managed to split one of the earring beads by trying to make the hole a bit bigger for the wire.  I hadn't taken into account that the polymer clay shrinks when being 'baked'. I made another earring with the only other bead I had of similar size - but the shape is different.  You just can't get two beads exactly the same shape when you roll by hand!  It's not an exact science - so I'll have to find out how to do it properly.

I needed the practice at making a strung necklace and bracelet and wiring the earrings - so this might not get worn!   

I am 100% certain that I will look back at this and cringe, but I do think that it's important to keep your first efforts at anything, then when you progress you get the satisfaction to see how far you've improved.
I have not improved however, making polymer clay mosaic tiles with the air dry clay!  The don't have the finished texture or the deep colours of the clay you bake.  I have stamped them, and rubbed them with Rub and Buff.  I have tried painting them, and using mica powder, but I just can't get the quality of finish I am searching for.

I'll just keep practicing for now before I post any pictures.

Sunday, 15 January 2012

Polymer clay day three

Well I had a go at sanding the beads, with three or four different textured sand papers, and after doing about 20 I gave up.  They didn't really look any different to the ones I hadn't done, and the job is really labour intensive and messy with the wet and dry sandpaper.

I have joined a polymer clay forum and there are different of opinions regarding the bead tumblers and the sand paper you have to put in them.  So for now I'll not be buying a bead tumbler until I am sure that I will get the use out of it - they are quite expensive.

After re-reading one of the books I have, I discovered that you don't 'have' to shine the beads, and you can varnish them with a polymer clay varnish if you want too.  There is a matt and gloss version.  So I'll leave that in obeyance for now too.

I have used some of the beads I made to make a bracelet - for summer wear - and I have enough left over to make some earrings and a necklace.


You can just about see a bit of a sheen on some of these - but with the pattern it's not really necessary.

I have made a start on some tiles for a couple of boxes I am working on. I am using air dry clay for those.  I made the tiles yesterday, so can't get to work on them until Wednesday when they will be properly dry and hard.

So I am off to paint a couple of wooden boxes in readiness for the projects.

Friday, 13 January 2012

I am on a learning curve - I may be some time!

Polymer Clay - starting at the beginning!

I just want to dive in and produce brilliant things - but it's not working out that way!

I have some books, I have some clays, I have a pasta machine, I have the oven, but I still seem to be lacking in tools - which I found out when I started!  So I have been ordering the other bits and pieces that are necessary.

I have taught myself the very basics, but it's all going so slowly!  The clay needs quite a bit of 'conditioning' done that - there are lots of different clays for different things - I know that now!

 Having made some beads, I find that they now need sandpapering with several grades of wet/dry sandpaper, and the use of a drill plus attachments to polish and buff  them to make them shiny!
These are called bicone beads!
The hole looks huge - it isn't it's the size of a pin pushed through - these beads are small.  To make them you mix your clay strips together, make a small ball, lay it on the work surface, place a piece of perspex on top and roll it around - and it ends up looking like a little flying saucer!
This one hasn't been sanded yet!  When it has the lip around the hole will disappear.

More experiments....
This time  using air dry black clay.   Which means it doesn't need baking.
What it didn't say on the packet was how long it takes to dry - so I have done these all wrong!
I rolled it out to condition it - it's very sticky so not as easy to work with.  I left the pieces overnight before colouring them in gold, and silver rub and buff and leaving that to dry, before rubbing them.
These items are meant to be faux historic finds - I know, but I'm only playing with these!
Little Japanese faux metal calligraphy (but I have just noticed that I need to cut off the extra 'leg' on the piece on the right - doh!)
 
This is a work in progress.  I stamped on some black air dry clay and used rub and buff again, and added the lovely inchie which I have had for a few years now which I received from Hilda in a swap.  I need to fill in the grooves with something - maybe beads or something - and add another layer of R&B.

So the things I did wrong was because I didn't find out about it until I had seen a post on a forum:-  The black air dry clay about takes 'a few days' to dry.  You have to keep turning it so that it dries all the way through as it has a high moisture content - and you must NOT paint it or anything until after a few days.  Oh well - at least I know what not to do now!