Saturday, 7 January 2012

Charm bracelet - Just beads

I love these beads, they are individual works of art.
You wouldn't think that with the addition of the fine gold wire work that they would 'go' with the silver chain.  but with the addition of silvery glass seed beads, and the painted flowers on each bead it seems to work

They seem to match with most outfits.

Apologies for the photo - I took it before I bought myself a new light!

Thursday, 5 January 2012

Charm bracelet - another present.

I made this bracelet for my other son's partner, for Christmas
She likes black - so I found this a challenge.

Luckily she too loved her bracelet and unbeknown to me, the stone chips I bought are her birthstone.

It was a heck of a job to get two stone chips to balance on top of each other so that I could wire them together.  The wiring took a lot of hours work for me, a beginner - but it was good practice.

Wednesday, 4 January 2012

My progress on the jewellery making front.

 I made this set of jewellery for my daughter in law's Christmas present.
The pendant stone is glass, and the blue tubes are just fascinating - they are different blues and silver - I haven't a clue how they make the glass like that.

They all look brighter and shinier in real life - and thank goodness, she was thrilled to bits with the set.

Tuesday, 3 January 2012

Polymer clay day two

I've spent the morning finishing off my polymer clay bits that I started yesterday.  I am just too impulsive to wait for the polymer clay workshops to start - they are not listed on the site yet - so I am just playing around at the moment.


This is one of the oriental dragons.  I didn't sand it very much - just the sides, as I wanted it to look like something vintage - and dug up on an archaeological site.  I gave it a coat of black acrylic paint, then some gold rub and buff paste - then gave it a rub.  It looks much better in real life and I am pleased with my first efforts - but undoubtedly I am sure that I will cringe with embarrassment when I look back at this in a few months time.

The leaves I should not have photographed under a spotlight as they look incredibly shiny and plastic - but in real life, they are a duller colour and not shiny.  I think I will apply a dark green paint, then they will look more like rose leaves which are much darker.


I am going to attempt to make roses or rose buds - and I might make more leaves and try to attach wires to them, and to the roses - or not - depending how I get on.

Monday, 2 January 2012

It's been a while - Happy New Year

Playing with Polymer Clay.  I was so lucky to get some Polymer Clay and books for my birthday and Christmas presents.  We've had a busy time as has everybody over Christmas - so I made time this morning to have a bit of an experimental play.

None of the following are finished examples - they have been cooked - but not finished off yet - I just wanted before and after photos.
 I have managed to make some leaves - yet to be painted - and next I want to have a go at some roses.
This is a bit of a cheat - I made a mould - it's not as easy as one assumes it will be!

This one is a bit clearer to see.  

 A little cameo  - which I need to paint - or not.   Like all the others it needs a bit of sandpapering.
And yet another cameo in white.  I'll have to get it under my magnifier to sand it - her nose looks like it needs some attention.

I'd best look up how you paint polymer clay.

I was quite pleased that I baked them without them burning.   I have been busy bulk cooking really large pumpkins today - so when they had finished I popped these in to the oven between two tins so they had their own little oven - and just turned the oven off and left them to it for half an hour or so.

Saturday, 26 November 2011

Did you say beads? Job Lot Jewellery stash

Earlier in the week I went to see a lady who was giving up jewellery making - inasmuch that she was not making any more to sell.  As she had some stash surplus to requirements I jumped at the chance to buy it!
Lots of little seed beads and some bigger ones

Another nice mix of different sizes

I love these golden hearts with different colours in the glass

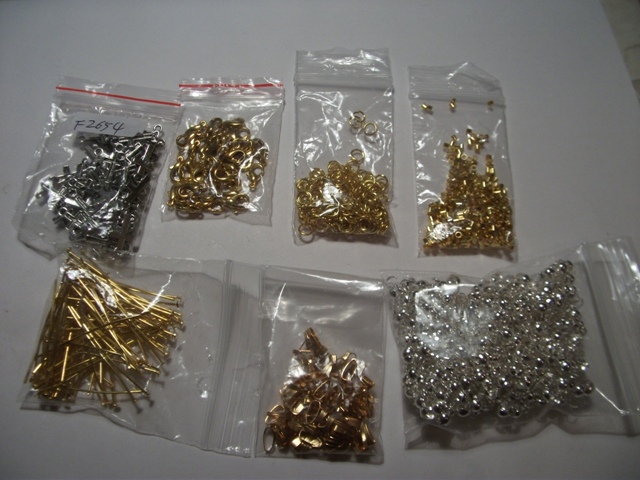
Findings - there are enough gold earring blanks to make pairs for hundreds I think!

A 'string' of shades of blacks/greys to be used in alls sorts of things - but I don't yet know what!!

More findings - including pins and coulottes

A little tiny box of these lovely colours -perhaps enough for a bracelet

More seed beads

These are those little self sealing bags - and I have used quite a lot already sorting out the stash

 A rather cute silver metal necklace - reminds me a bit of an Egyptian style
 Several packets of 'chilli peppers' some already make up into earrings and others just the bunches

Some little pendant gems

Some pairs of earrings mixed up with the beads

My desk - when I was discovering what was in the pile, and trying to colour sort it
 I bought these chunky bracelets for £10 each.
Not only do I think they are gorgeous - I can study them in detail

And use them as examples to get an idea of composition too

I bought this earring and necklace set - the beads are lovely seaweed green/blue and this pattern was a copy of and Egyptian set.

Oh, and this bag of charms came in the stash pile.
I have sorted them out now - and the bulk of them are 'halloween' themed.
Wolves, bats, and scary mask/skeleton faces.  There are also little hearts as seen on a bracelet above 'Made with Love' on them, some pendant blanks, a few stars, and fairies.

These should keep me quiet for some time!

Monday, 21 November 2011

Silver Clay Workshop

Another tick on the 'Things to Achieve' list.

Saturday I went on a day long Silver Clay Workshop with the famous Sue  Heaser

Was I nervous - you bet!   But she is a lovely lady and has such a wealth of talent - and her work is awesome.  As you will see if you look at the link above to her website.

 This was my first attempt at the silver clay jewellery piece.  I am so very disappointed with it, and if the silver wasn't so expensive I would have binned it!  Sue is a brilliant tutor - it's me the pupil that's not very good.  I guess that stress had a lot to do with it.  A long drive on narrow country lanes all the way from where I live. Mist, then piercing sunshine which was in my eyes all the way, so I had to screw my eyes up to see as I didn't know the area, and I arrived with a headache!
I started off making an oblong with an art nouveau style flower impression on it which I loved.  Unfortunately I had stamped the impression on the hough as we call it where I live - a bit wonky, not quite straight.   I didn't honestly mind that - as I liked the imprint on it and would have worn it 'wonky'.  But I needed to do it again, and there are only so many times you can fold and roll the clay and this was my last 'chance'!  In my bag, I had taken along leaf cutters, and leaf rubber impressions that I used years ago in sugar craft - and it would have made a beautiful leaf - but I kind of felt too shy to mention it to Sue in case I offended her as she had an amazing array of things to leave impressions with!   The impression on this is made with a skeleton leaf, and when burnishing it after firing, I rubbed a bit too long so the pattern one side is 'shallow'.  I thought the silver would be as tough as a spoon, but as this is pure silver it is softer.
I should be proud with my first effort as a complete novice - but it's the 'perfectionist' in me that's disappointed.  The veining is black and it looks more pronounced in real life than the photo shows - but my photography skills are lacking - the silver just gleams.

The afternoon session - after a lunch break and a couple of paracetamols proved a bit easier for me - not a lot!  There was a lot of information to take 'on board' to understand the nature of the material and the drying and firing of it etc.  
Can you guess what the above is?   It's the reverse side of a teeny, weeny, charm - not even as big as a 1p!  The pattern is made by pressing a scrap of lace into the clay before drying.
It's a tiny, but very ornate cup and saucer - vintage style.  I need to buy some really 'smelly stuff' can't remember the name off hand - liver of sulphur or something like that.  Then I have dunk it in and keep doing it until it all goes black, then polish it again to reveal the silver which leaves the impressions black!  It'll really make it look good.
This is a tiny initial - again smaller than a 1p - and definitely needs the dunking treatment so that the flat impressions are black and the raised parts will be silver and really 'pop' - and will, I think, give it a Victorian look.
Am I gradually improving?
A teensy weensy fish - made with a scrap of leftovers - just as long as my smallest finger nail.  Again needing the dunking treatment to reveal its lovely fishy scales etc. 
And this last piece I like the best - although it is small!
It is just big enough for a pendant - and I am very proud of the texture made with lace on the back!

I have to say that I made this as perfectly as is possible - at least for me.  I didn't have any cutting or filing to do - so was rather chuffed and relieved I have to admit.

This is just as perfect as a real sea shell, with so much texture I just love touching it.   When I buy this 'soaking stuff' to turn it black then polish it, you should be able to see every single rib and detail.
The drive home was in thick mist and darkness - very nerve wracking but 
I DID IT!

I bought a few basics from Sue's little sales table to start me off - and I was also pleased to be able to buy her gorgeous book.

I have to admit to being a bit of a 'groupie' and asked Sue to sign it for me - it'll not only be my Silver Clay 'bible' but a lovely keepsake of a very memorable day!
Thank you Sue - if you ever get to read this!

I am going to save up and do another of Sue's courses next spring - when the weather is nicer and the nights are lighter!