Saturday, 10 September 2011

The Vintage Specs Case Saga

Well the vintage specs case turned into a saga - I was too tired last night to write about it!   Not being the most experienced person on a sewing maching (understatement - mine is hidden in a cupboard and only comes out when I need to get something else out) - I should have thought seriously before I put my name down for the swap!

The  case my swap partner chose, was in fact my fifth attempt.  I thought you might like to see my other attempt - well the only other one that got finished.

It started off O.K. - I used the colours preferred - brown and gold.  Two layers of material thick cream inside and silkie thick material outside.  I dyed the lace, used vintage gold silk to attached the lady to, and was hand sewing on the gold bead trim at this stage - it looked much better in real life the gold beads really were lovely gold.
 This was Mk 1 finished and with a pair of specs in it - so it looks a bit lopside.
This is the back which is wonky - I just couldn't get it to go straight - I think the material I used was far too thick.

I took it apart and tried again .
 I did manage to get the back seam a bit straighter - but not central as it should be!  I sorted out the chunky bottom hem, dyed and added silk ribbon around the top to hide the seam.
The top is a bit wonky now - but the silk ribbon and bow is a bit of a distraction.
The bottom is nice and flat now and no longer chunky as I unpicked that and then once ironed, I sewed it flat adding more dyed lace and ribbon to disguise the seam.

It's far from perfect but OK for  me to put my reading glasses in.

The other (aborted) attempts I tried......
An envelope style one, where you just fold up a third to create the pocket, and the remaining is the flap.  But - why does there always have to be a big BUT!   If you sew the seams of the pocket, the flap is too wide, so you need an overlocker machine so that you can sew it all flat in one go - the stitches like blanket stitch or similar - guess who's machine is basic!   The other attempt was still using the two flat oblong pieces of material, cut a corner off - then do a curved stitch all the way around as a pattern and the cut around the curved bits to create a fancy border.  Not as easy as it sounds with a basic machine and at that point, if I were strong enough, the machine would have gone through the window!
My final attempt was the one in the previous post.
These do actually look a lot nicer in real life!
Think I'll skip the sewing swaps in future!


Friday, 9 September 2011

Heavens to Murgatroyd - I have managed to make something.

Well it's been a long time coming hasn't it!
I finally joined in a couple of swaps on a forum I belong to.
One of which was to make a specs or phone case, whichever your partner preferred.
My partner Pattie wanted a specs case - and so did I so that was good.
You can't see it well in the photos, but this material has a lovely printed pattern of gold overlaying, and highlighting the coloured pattern.  It is a reproduction of an Elizabethan/Tudor pattern.

The front  has a panel made from a vintage French sample which is lovely and shiny like silk with an woven pattern of flowers.

I made a number of attempts at different specs patterns - and failed miserably at them all.  But this was my second attempt at this one - my own 'pattern'.  It is lined with thick cream material with an embossed cream pattern on it - another sample piece of  upholstery material so it's nice and soft for the specs.

This case has taken me a large amount of hours to make (I am too embarrassed to own up to how many) and at the moment it's the best I can come up with.   

I'll have to start 'playing' with my sewing machine so that it's not alien to me!

Tuesday, 6 September 2011

Yours Artfully Pastel Giveaway

You just have to visit here  to see the new Pan's Pastels that Lin has in stock - and the amazing things that she has made with them.  You can also be in with a chance of winning some!

Awesome

Monday, 15 August 2011

At last - I have managed to make something!

It took me over a week - I am so slow and out of practice.  'Life' has been getting in the way of crafting, but I am sure once the autumn comes and there is less going on, I'll get back into it.

My daughter-in-law's parents are visiting from Japan, so I made them a little book to take back with them of photos of his stay with them last year (this year was cancelled at the very last minute due to the Tsunami) and I have also included 'big' events of this past year up to date.  Such as first day at school in his new uniform, winning a medal in the school sports day, special photos with mum and dad, learning to ride his bike without stabilisers in the pouring rain - that sort of thing.

The book was inspired by one a forum friend Paula made me - you can see her blog here  obviously mine isn't a patch on the one she made, and I didn't have all the wonderful embellishments she used, but Haruko's parents seemed very happy with it and my grandson explained to them in Japanese all the events and Haruko translated all the messages for them.

It was a very hot and humid six week summer break in Japan last year so an afternoon nap was essential!

There are lots of exotic insects in JiJi and BaBa's (grandad and grandmother) garden.  This was a green stick insect that was on his bedroom windowledge.  At least I think it was a stick insect.  Long and bright green, with long long legs - and perfectly harmless

I won't bore you with the rest of it - just wanted you to know that I haven't given up!


Thursday, 4 August 2011

Time for flower arranging again.

It was our annual flower arranging and lunch day yesterday
The weather was excrutiatingly hot and humid but we still had fun.
This is a pew end but as I don't have a pew, its laying on my table.

This very large arrangement is difficult to display.

It smells wonderful and is designed to look nice from all sides.

Its in a long tray which holds three Oasis blocks so quite a lot of space to fill.
We all took food for lunch - and had a veritable feast - it was great - and there was laughter all day long.

(We made the little pew end arrangement in the afternoon - as you can probably guess.  We were all wilting from the heat, and full of fabulous food)


Thursday, 7 July 2011

Getting out of the doldrums!

I received my monthly email newsletter from UK stampers - with a Vintage Challenge in it.  I took a look at the links and decided to have a go.   It's taken me a few days - and I think it's kicked me out of the doldrums and hopefully back into crafting.
There was a 'recipe' of things to use - some of which were a vintage image.  Which you can see above. I have enhanced it with inks, and sewn on an embroidered piece of lace embellished with sequins.

As cards seem to be my downfall, I decorated an old cardboard box and turned it into a jewellery box for a necklace a friend made for me.
  I covered it with really old vintage material which I enhanced in places with ink to give it depth and more colour.
Other elements I included from the 'required' list are a vintage shirt button in the top left hand corner, a scrap of frayed vintage ribbon which I have stamped, and I have edged around the box with vintage lace - I had just enough to go around it, and I 'curled' it over the lid to make a frame.

When I started out the old material and image looked flat and faded and, well ordinary, but with the addition of the inks I painted on here and there, it seemed to come to life, and I was rather pleased with the enhancements to the face, bonnet and ribbons, shawl, little flowers on her dress, and the addition of the pretty lace.

I added quite a bit of shading to the roses, and some of the leaves, and I found a little butterfly at the bottom which had faded so gave that some ink tinting with a combination of the rose colours.

Thank you so much for looking and leaving comments - I have been 'away' from blogging for so long, I thought you would have all forgotten me!


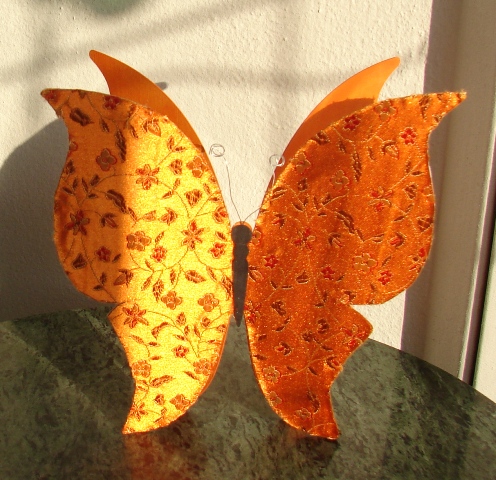
Butterfly Card

I had a go at making a butterfly card from a template featured on Cardmaking Paradise

I went down the stamping 'route' and embossing 'route', but couldn't get a result I was happy with, so decided on using a piece of Chinese silk that really shines in sunlight.

I coloured the two pieces of card with ink and added a quote