Monday, 3 November 2008

Bamboo Domino - Pink Lady

You saw this dangling in a jam pot yesterday evening - and here it is finished at last.


I painted the domino with two coats of Lumiere paint to match the images. When dry I glued them onto the domino - doing one side at a time. At gave it a couple of coats of Shellac to seal and waterproof it.


I used the same process for the front using a vintage image.

Then I chose some beads, which although look transparent here, they have tints of pink mother of pearl when the light catches them.

The silver topper (for want of a better word) was rather a challenge to put on. It is firmly attached through the domino with wires and those have been superglued into the holes make it rigid. I just need to add a silver ring to it - then decide what use to put it too.

I finished it off with a further three coats of Shellac - to creat a lovely glossy but soft look.

Bamboo Domino


Well this one has had its last coat of shellac - on the back of the tile


And on the front. I took these in daylight so they look better than the photos I did yesterday.

I am still working on three more!

And have ordered lots more!

Sunday, 2 November 2008

Domino Tiles - work in progress.

I have had these wooden domino type tiles for a while now - so thought it was about time I did something with them.

I thought it would be quite simple to alcohol ink them and then stamp them - which I did with a few.

But

I found that the alcohol ink sunk into the wood and looked rather pale, and the pigment ink I used for stamping refused to dry - then overnight it had almost dried - and after another night it also seemed to have sunk into the wood leaving a blurred looking print.

BUT I have ordered lots more and have lots of ideas - so I will master the inking and stamping and other techniques on them I am sure - watch this space.


Or is it the case of a bad workman blaming the tools.


Starting afresh with more tiles, I tried painting the surface with silver acrylic paint - which showed up the grain which I thought was quite nice.


I added an image then gave it a coat of shellac and left it to dry overnight.

The next day I added metal leafing - which was a rather sticky job. This metal is not showing up too good in the photo. I gave it another coat of shellac and left it overnight.


Today I did the reverse side. More shellac and then the leaf of metal. Then brushed over with a soft brush.


In natural light the leaf metal I have used both sides is the colour of pewter but with a rainbow of shades that changes in the light. A bit like when you look into a puddle and it has some oil on it and you see those rainbow reflections.


Once brushed it removes pieces at random - revealing the dark silver beneath. My aim was to give it an aged look. I threaded wire through it - and transparent bead which marries with the reflective colours of the metal leaf work.


I was trying to give it a distresed look - of finding a relic from a bygone era.

I have given it another coat of shellac each side and it now hangs - yet again for another 24 hours with others below.


Works in progress.........................

They could be pendants, bag charms, key rings, mobile phone charms. The one featured here might have the recipient's initial on the back - lots of possibilities - for my work in progress.
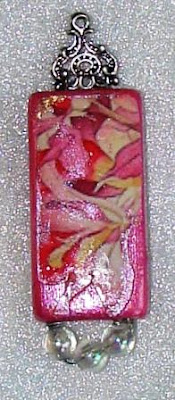
Friday, 31 October 2008

12 Days of Christmas Ornaments

On Zuzu's forum we were invited to join in a 12 Days of Christmas ornament swap to a set template size.

I was given 8 Maids a Milking


I made a set of we red and gold ornaments - but they ended up in the bin after I had worked on them on and off for a week. I had spent hours over several days looking for a suitable image to no avail. The template size I found rather challenging for my 8 milkmaids because of it's shape and size.


After a number of yet more failures I had finally finished.

The photos don't show up the glittering metallic paints - several painted layers on each side of the template. The embossing, the rub and buff gold, the glittering eight sequins on each one and the little gold detailing on the milk maids necklaces, skirt edging, sleeves edging and some have gold 'buttons' on their boots.

The reverse is painted and embossed too with a gold crackle finish.


They all look the same - but every one is hand painted and each one is different - there are no two the same.

I wish I had an easier day of Christmas to do - I had lots of ideas for a partridge in a pear tree, or two turtle doves - as I am into birds - LOL.

Still I have tried my very best and some of them will be winging their way to Australia on Monday.

Thursday, 30 October 2008

Tag Book - Swap received

I entered my first ever tag book swap and it was on Katy's Corner Group - and I am so thrilled with it - just look!


It was hosted by a lady called Dot and she made the cover and put the books together - isn't it fantastic. What a clever idea. It's just arrived and I can't stop looking at it.


Look at all these amazing colours depicting Autumn - and every single one using a different technique.


My most sincere thanks to:

Dot H
Wendy K
Sandra W
Lynne M
M S
Maureen

I will treasure it - and thank you for showing me all these techniques I can't wait to try them out.

Monday, 27 October 2008

Under the Sea Swap


Another Mermaid for the Under the Sea swap - these have been painted with Ecoline ink - splashed with water, a deeper ink used for eyes, lips, and other areas. A little wipe of silver rub and buff, and bright silver embossing - which looks dull sadly on here. Liquid pearls for her necklace - and a great deal of patience letting it all dry.

New swap - Under the Sea


I love this image - so when I saw a swap entitled Under the Sea - I thought I would join in.

This mermaid is embossed with bright shiny silver so looks lovely and shimmery - but its not showing up as such here.